SmartAIArticle is designed to help writers, bloggers, and marketers to writing an article efficiently with AI generator. In this guide, you will learn how to use SmartAIArticle to create high-quality SEO articles that best suit your needs.
Below are the essential steps to help you get started:
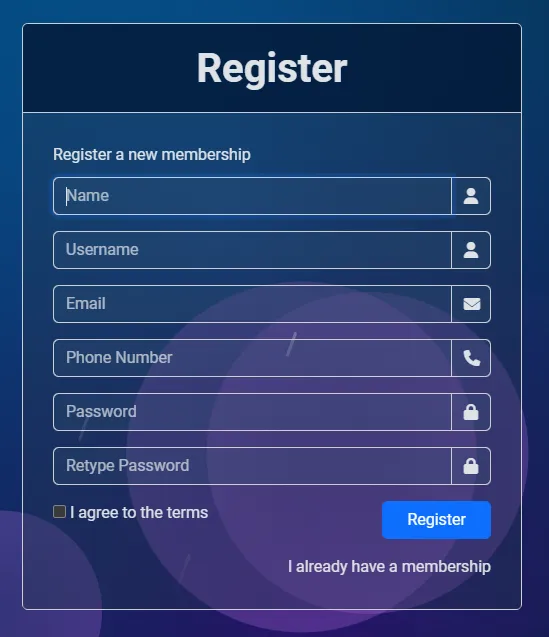
1. Register an account at SmartAIArticle.com
First, Click here to redirect to Register page, fill in the information and click Register.
Notably:
- A single email address can be used to register one account only.
- Password should be at least 8 characters including an uppercase letter, a lowercase letter, numbers and special characters (Example: SmartAIarticle123456@). For keeping your account secure, a strong password that is not easy to remember is recommended.
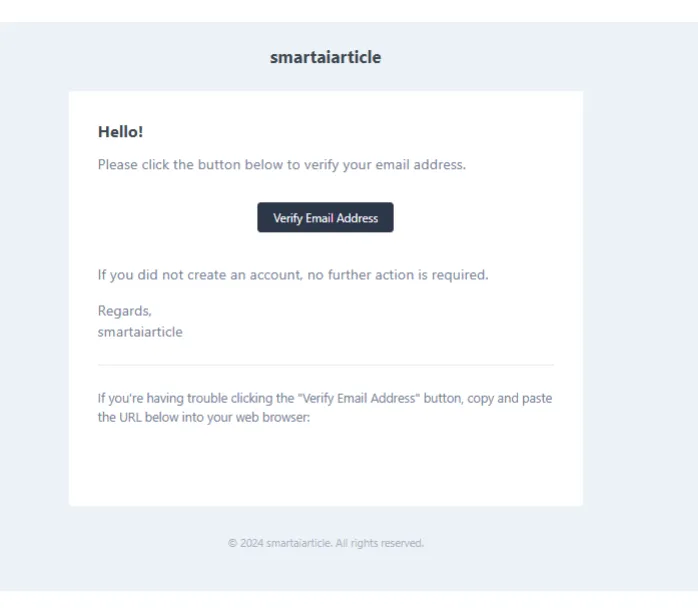
Next, an email verification dialog box opens, then you login your email to confirm account registration.
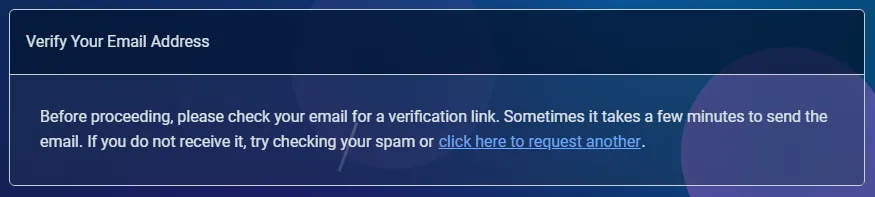
Next Click Verify Email Address.
In case you forgot the password, you can click on Forgot Your Password? and enter your email to update the new one.

The same as registering the account, the system automatically sends an email to reset your password. Remember to check Spam folder if the mail do not appear in Main Inbox.
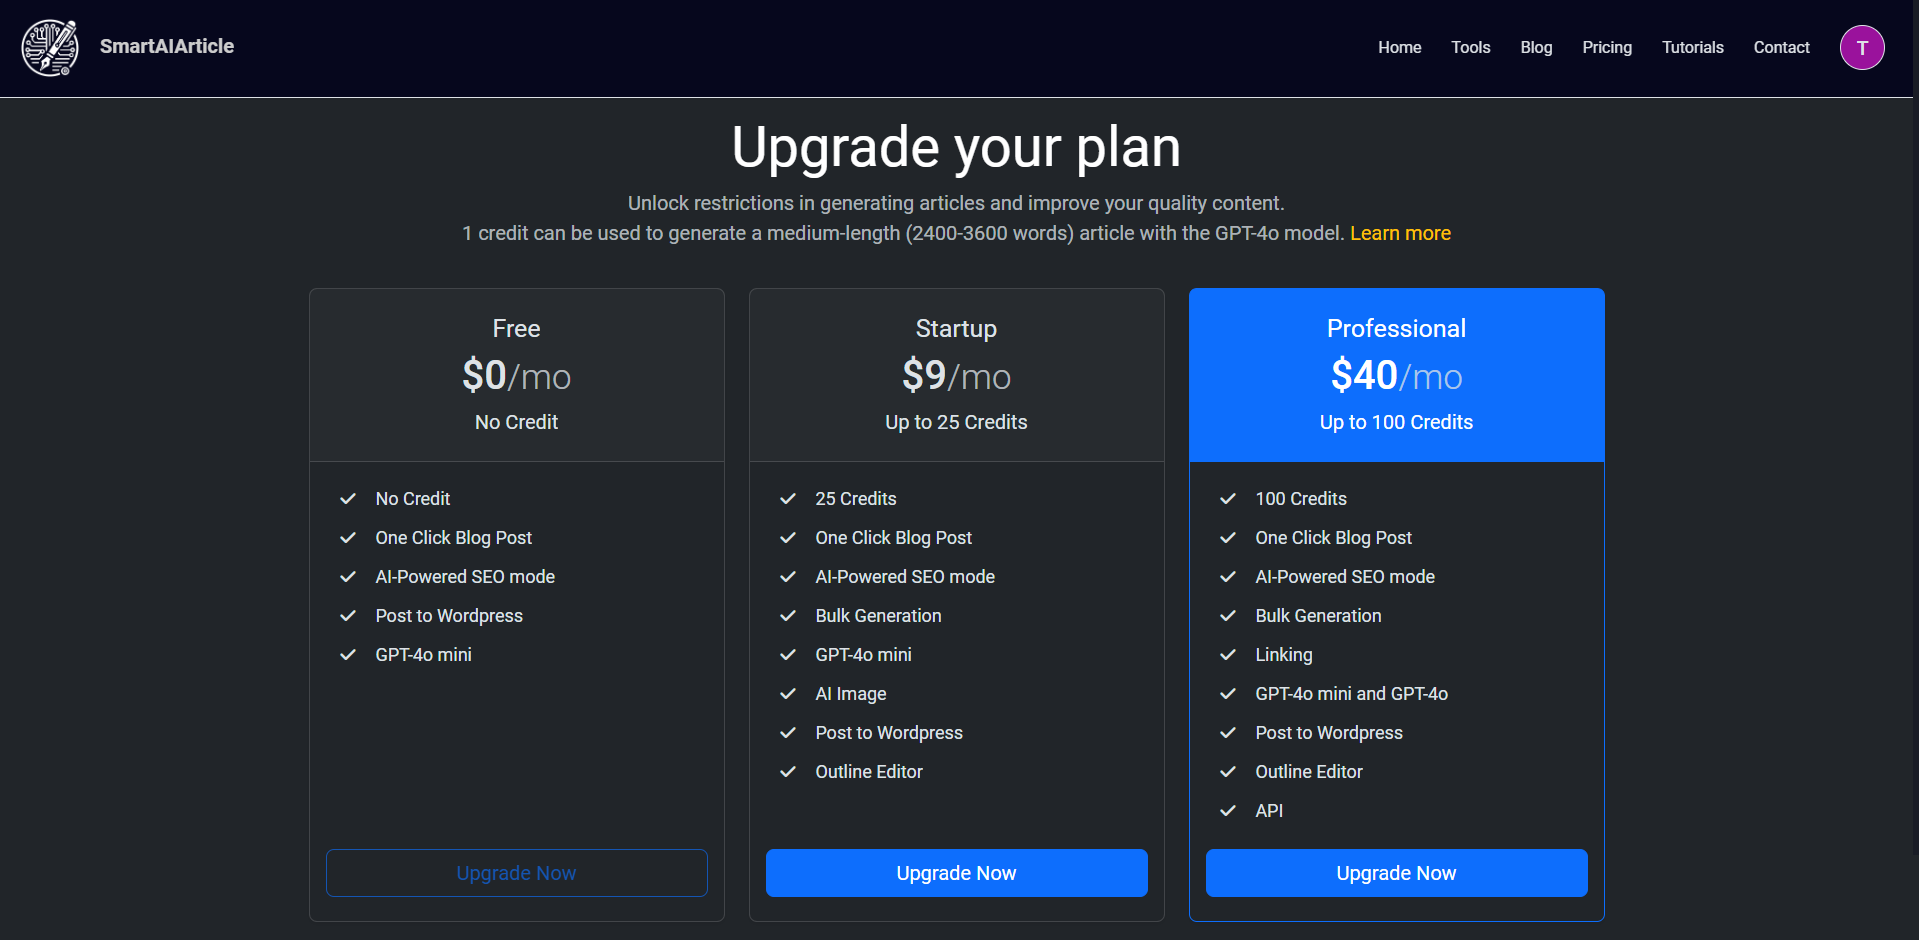
2. Subscribe to a membership plan
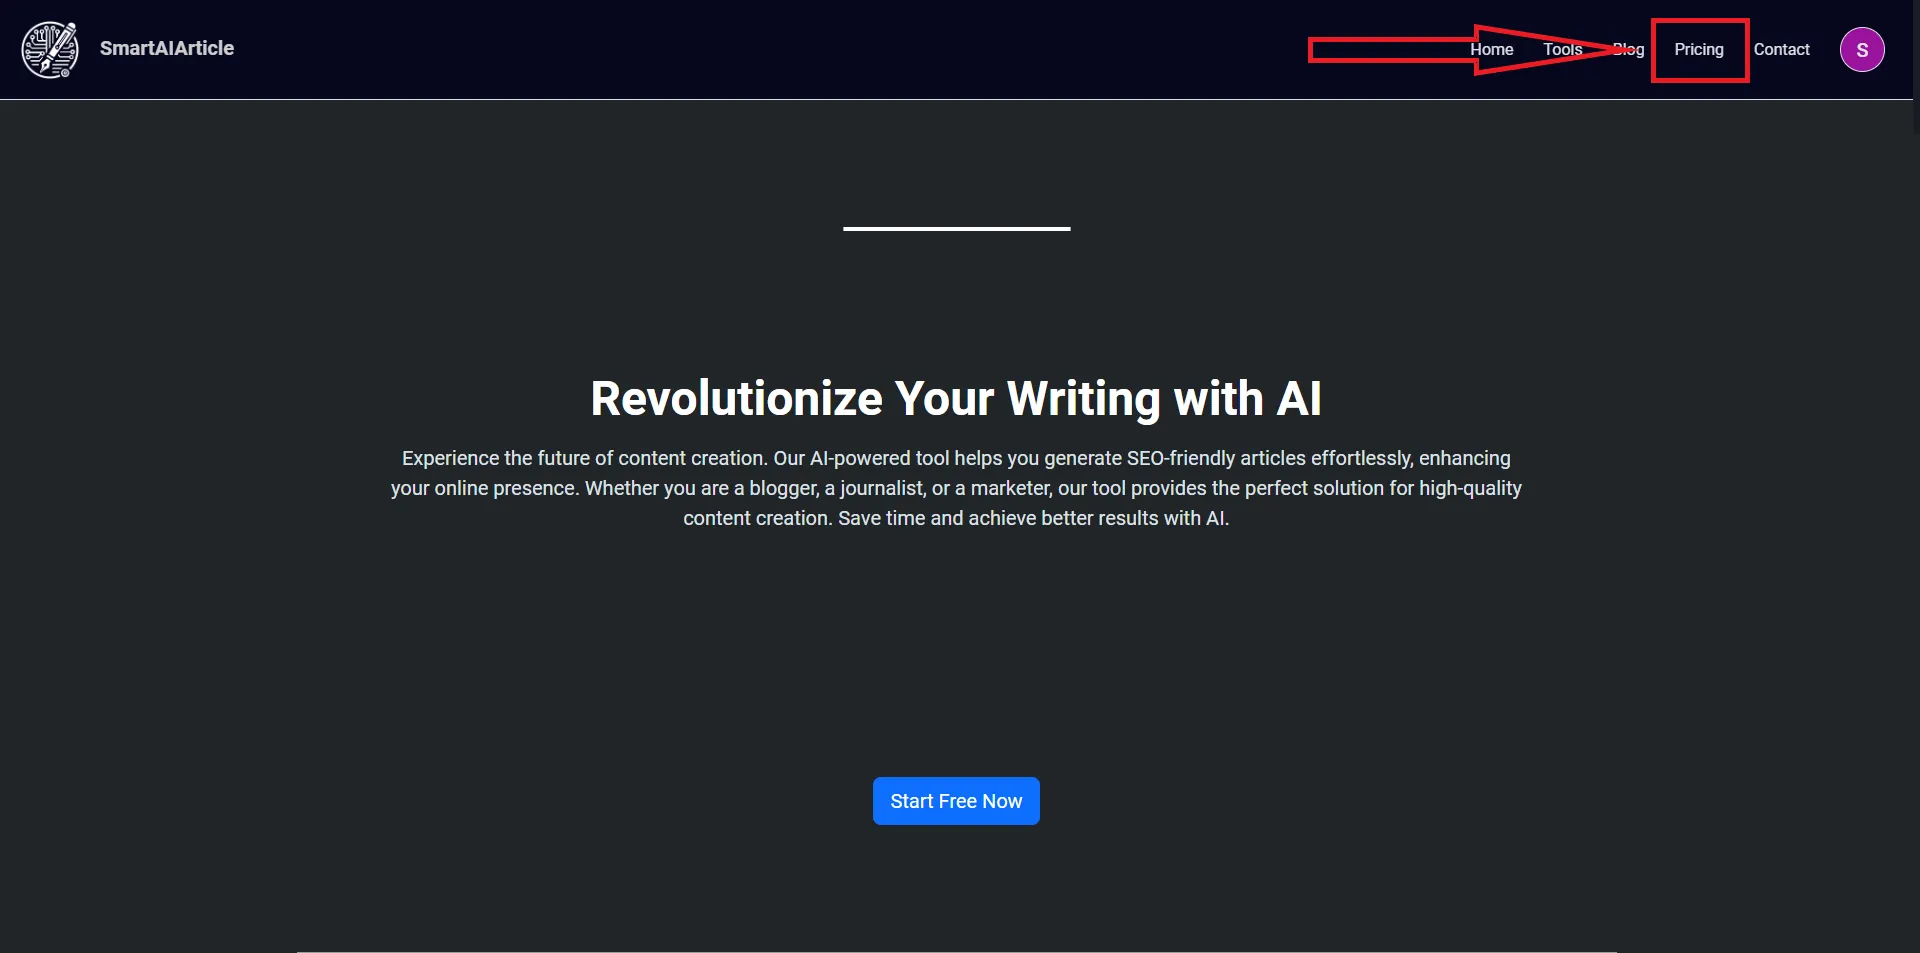
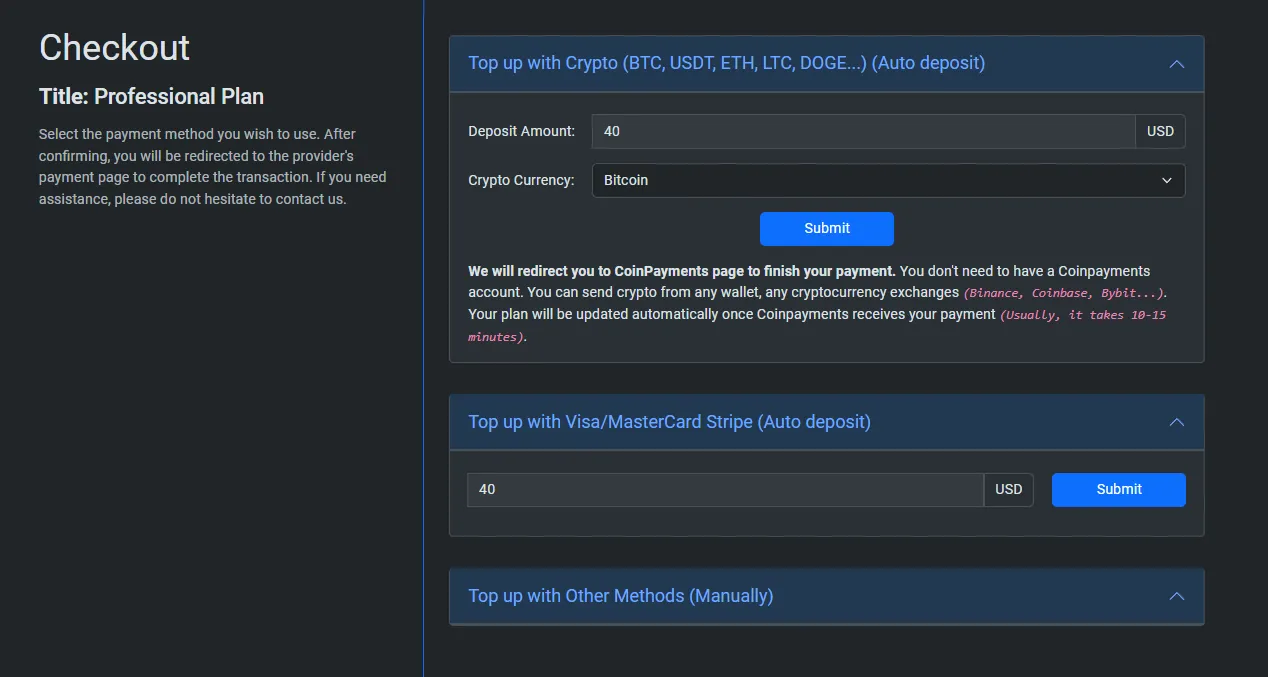
In the menu bar, click Pricing or click here to redirect to Pricing Page.
Then, select the membership plan you want to subscribe to.
Select a convenient payment method, if you choose Crypto Method, enter deposit account that you want to pay, update Crypto Currency and click Submit.
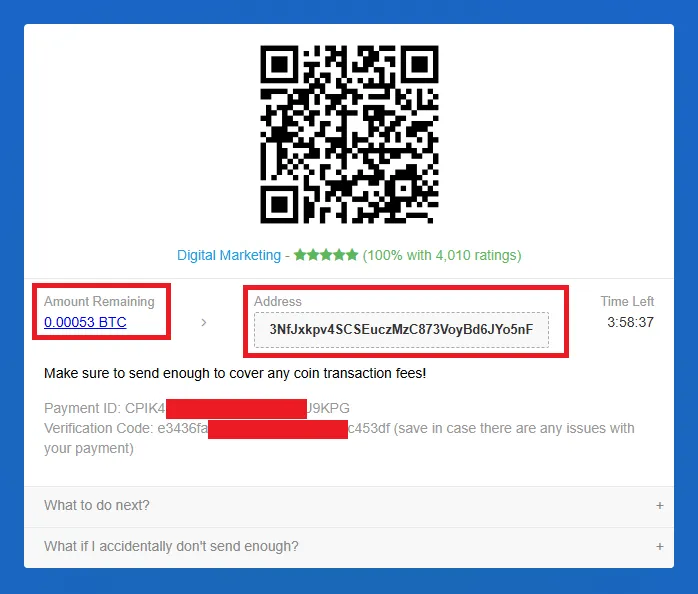
Next, the system will be redirected to CoinPayments page. Finally, you send Amount Remaining to the Address as shown to complete your payment.
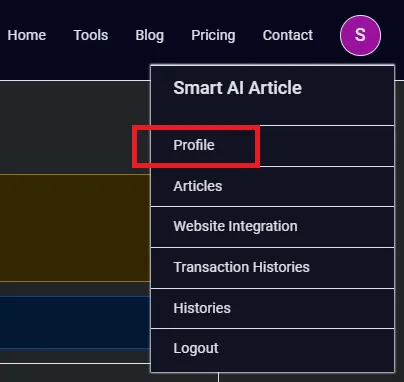
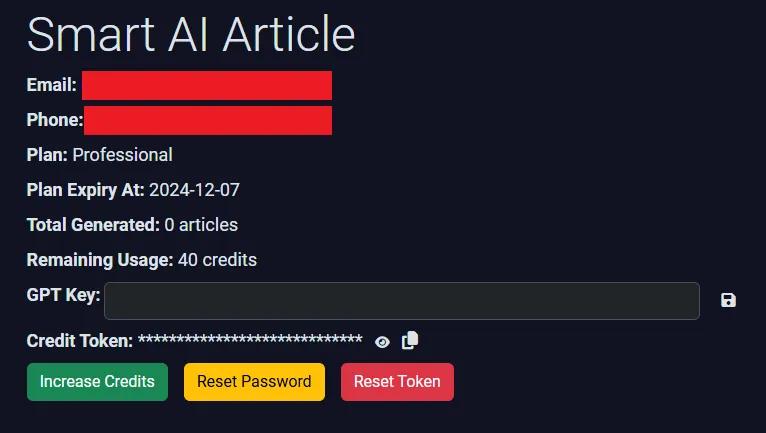
After completing the payment, you can check your Membership Plan and Credits by navigating to Profile.
3. Credit & GPT Key
3.1. What can 1 credit be used for in SmartAIArticle?
Below is the pricing table for each article size:
| Article size | GPT-4o Mini cost (Credit) | GPT-4o cost (Credit) |
| X-Small (600-1200 words, 2-5 H2 headings) | 0.3125 | 0.4167 |
| Small (1200-2400 words, 5-8 H2 headings) | 0.357 | 0.5 |
| Medium (2400-3600 words, 9-12 H2 headings) | 0.4167 | 0.625 |
| Large (3600-5500 words, 13-16 H2 headings) | 0.5 | 0.8333 |
Cost per image generated
| Image Size | Cost/Image (Credit) |
| 1024x1024 (1:1) | 1 |
| 1024x1792 (9:16) | 1.25 |
| 1792x1024 (16:9) | 1.25 |
3.2. Benefits of Using a GPT Key for Access
By adding your GPT key, you can experience faster generation speed and get a special discount – only 0.25 credits per service usage.
Example: If you generate a Medium-length article using the GPT-4 model, with a featured image and an additional 5 images sized at 1792x1024 (16:9) :
- Total cost when using the SmartAIArticle's key should be: 1 + (1.25 × 5) = 7.25 credits
- Total cost when using your own key should be: just 0.25 credit
To add a GPT key to the system, go to OpenAI’s API key page. Then, create a new key or copy an existing one. Next, go to your Profile tab and add your key at the GPT Key field.

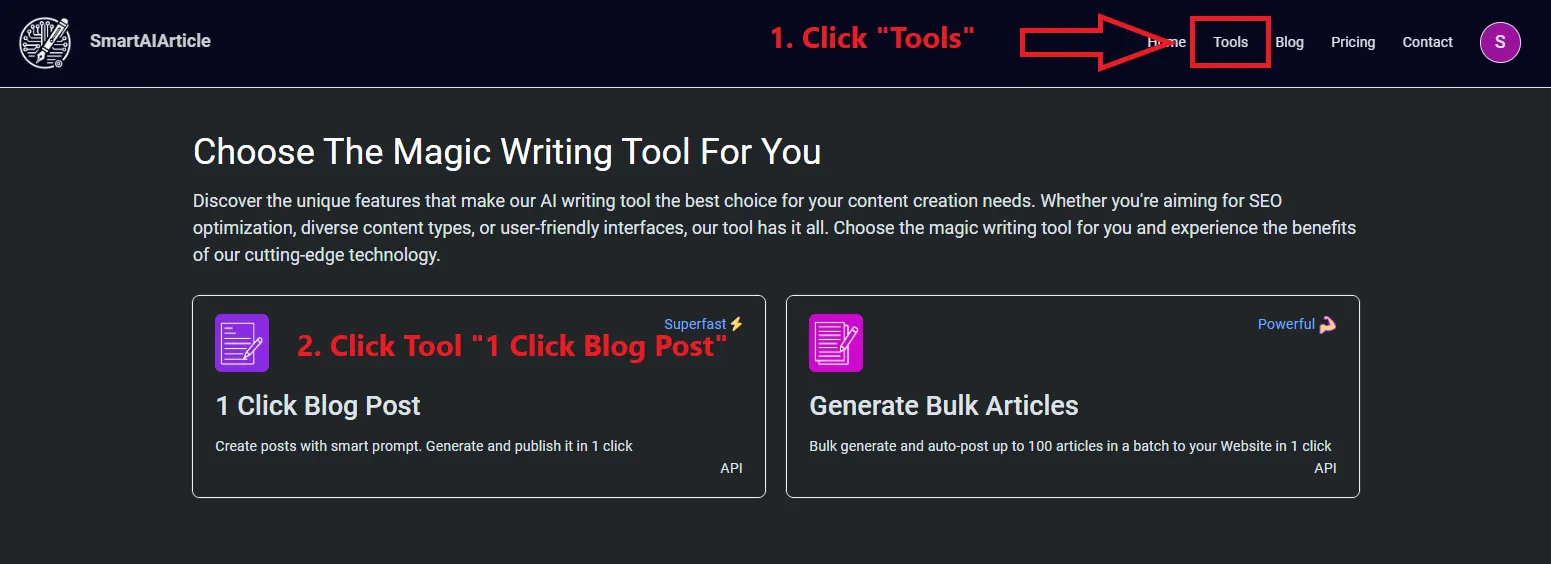
4. Generate an article
To create a new article, first go to the Tools page, then navigate to Tool tab => 1 Click Blog Post
On the Generate Article page, you need to configure the following elements to ensure that the generated article aligns with your preference.
4.1. Article Setting
- Topic: Enter a description for the article (if needed)
- Main Keyword: The major keyword that the article content will focus on
- Title: The title of the article; you can click the Generate Title button to obtain suggested title
4.2. Parameter Settings
- Language: The language of the article
- Target Country: The content of the article will be tailored to the selected country or region
- Writing Style: Choose the writing style of the article, such as Informative, Descriptive, Creative, Narrative, etc., that helps convey the content in a suitable manner
- Writing Tone: Select the tone of the article, such as Neutral, Formal, Assertive, or Cheerful, to create the desired impression on readers
- Perspective: The point of view in the article, such as I, We, You, They, He, She, It, etc. You can leave it as default or adjust it if needed
- Article Size: Choose the desired length of the article;
- Model: Choose the models available on the platform to generate content and images

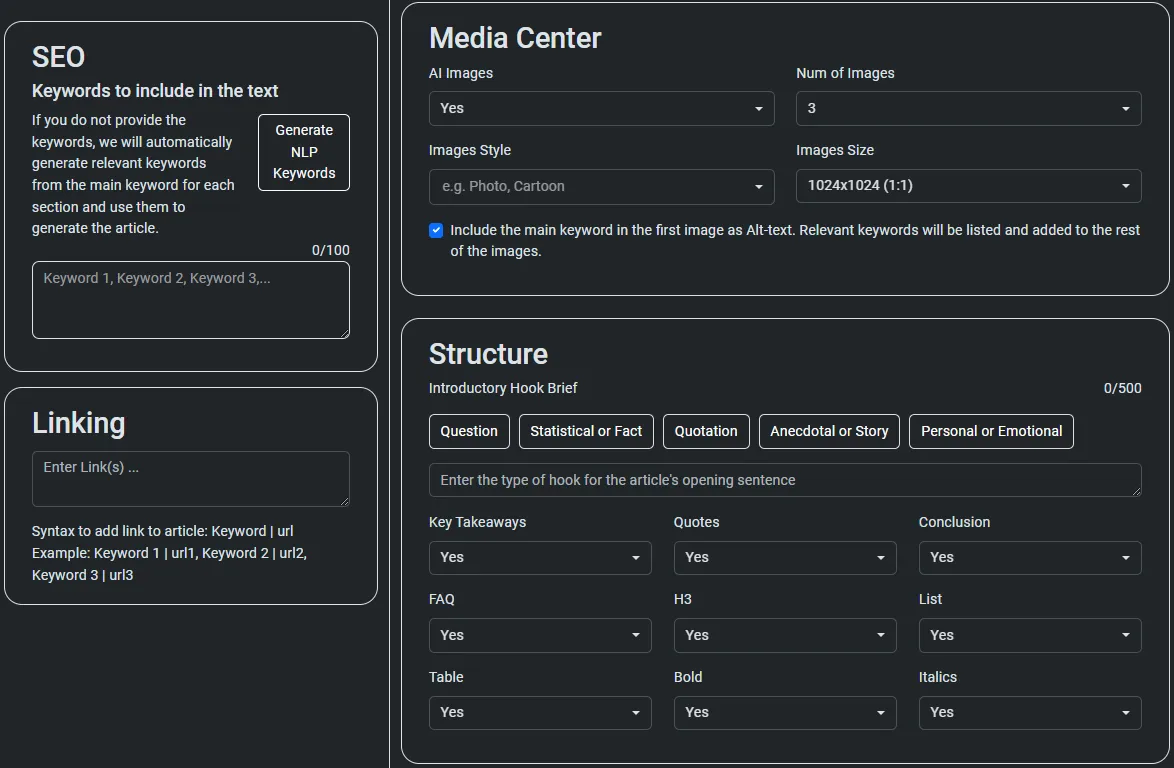
4.3. SEO section
NLP Keyword are words or phrases generated using natural language processing techniques to summarize the main ideas or topics of the text.
Add these keywords manually or click the Generate NLP Keywords. If you do not enter any keywords, the system will automatically generate suitable keywords for the article.
4.4. Linking section
Add links to your article subject to the format: keyword | URL
Example: the best AI article tool | https://smartaiarticle.com/, contact us | https://smartaiarticle.com/contact, 1 click blog post tool | https://smartaiarticle.com/generate-article.
4.5. Media Center
This section allows you to configure images for your article.
- AI Images: Choose whether to generate images within the article. This option does not affect the settings for the Featured Image
- Image Style: The size of featured image and other images will align with the size selected in this field
- Num of Images: The number of images to be generated for the article content. The images will be placed appropriately within the article
- Image Size: The size of featured image and other images will align with the size selected in this field
4.6. Structure
This section allows you to customize the structure of the article by defining the components and desired presentation styles. Specifically:
- Introductory Hook Brief: Choose the type of opening for the article, such as a question, statistical fact, quote, story, or personal anecdote, to grab the reader's attention
- Key Takeaways: Select "Yes" or "No" to decide whether to include a summary of key points
- FAQ: Choose "Yes" or "No" to add a Frequently Asked Questions section to the article
- Table: Decide whether to include a data table in the article
- Quotes: Add quotes to enhance credibility or illustrate the content
- Conclusion: Include a concluding summary for the article
- H3, List, Bold, Italics: Formatting and presentation options, allowing the article to include subheadings (H3), lists, bold and italic to highlight content and improve for readability
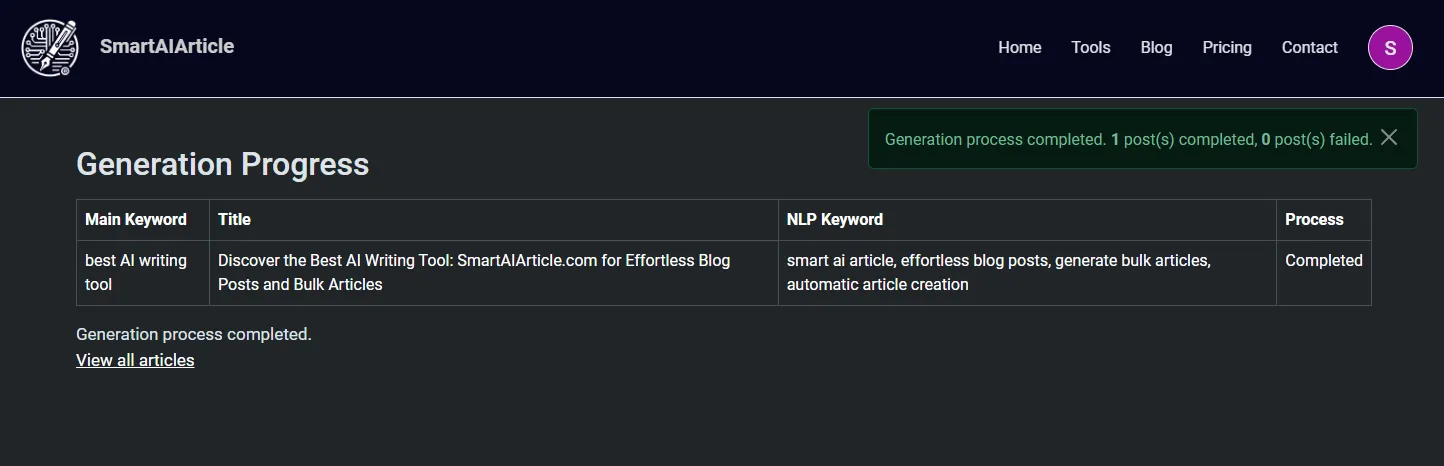
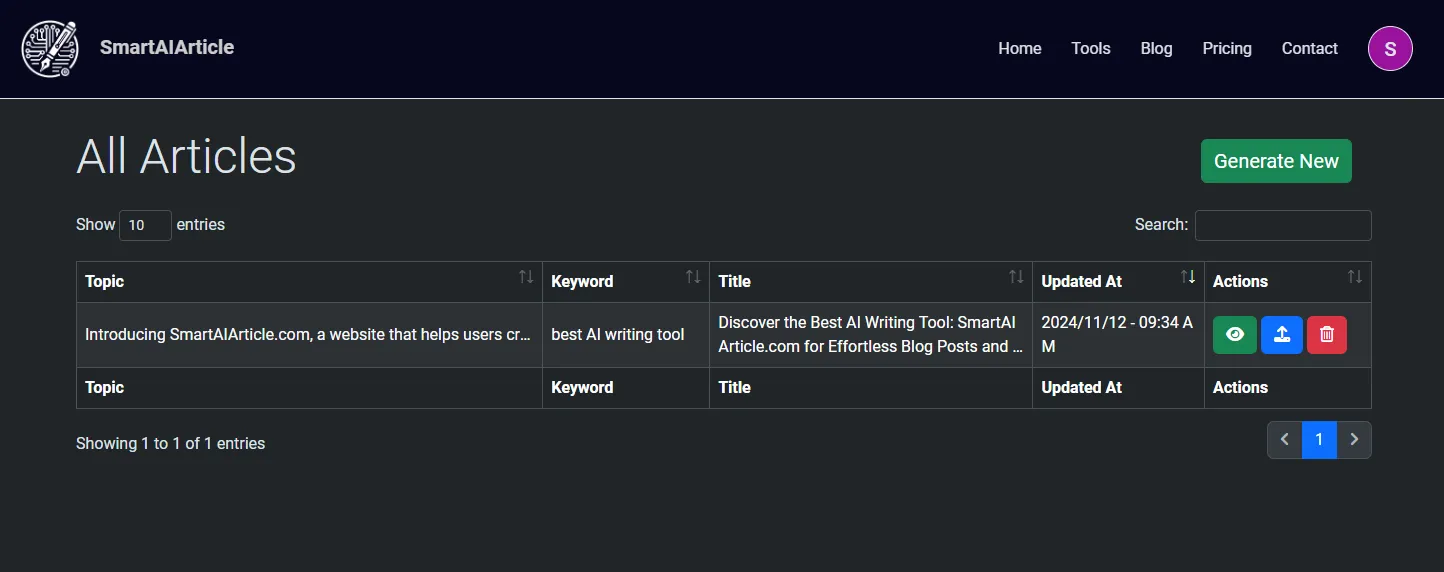
After you have configured the above elements above, click Run in the Article Setting section to generate the article. Next, you will be redirected to the Progress page . Once completed, click View All Articles to see the newly created article and other articles.
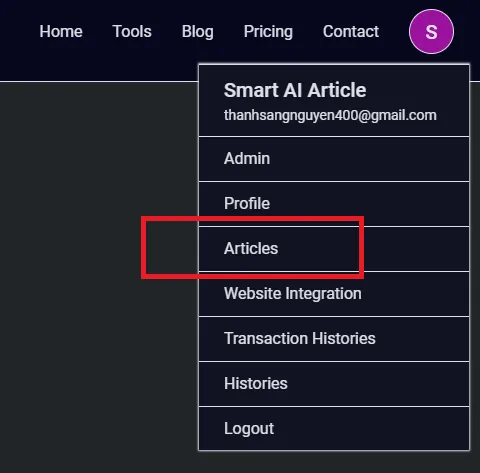
At Actions field, there are 3 options for you to view, upload to your website or delete permanently:
Here is a newly generated article:
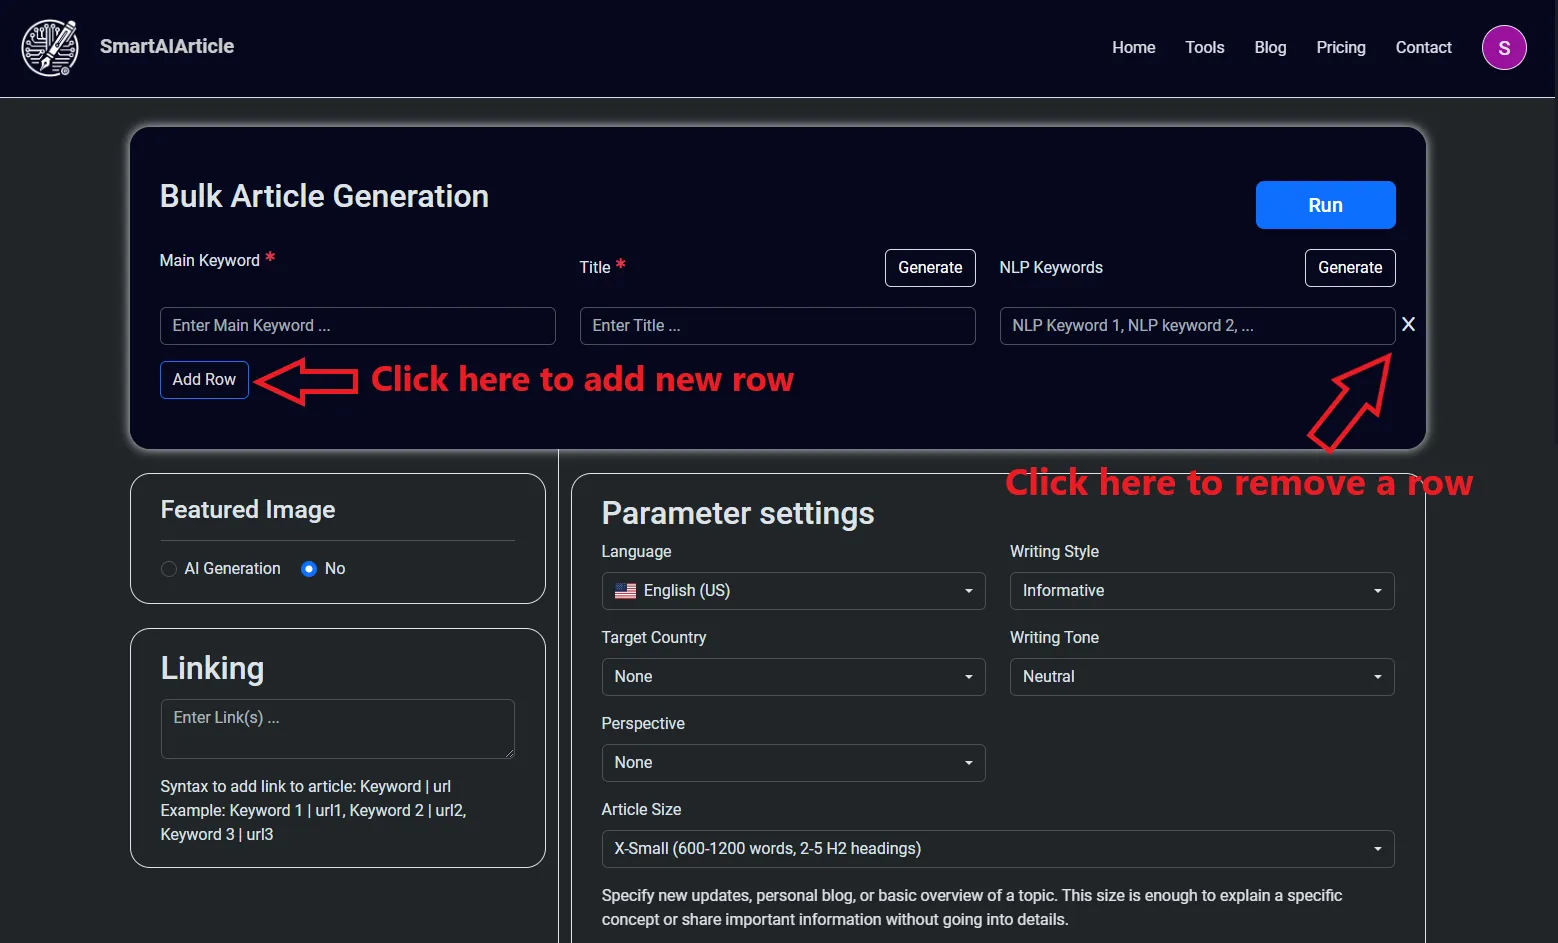
5. Generate articles in bulk
Basically, the setup process is the same as the Generate an Article feature. However, the following changes apply:
- The Topic field is not available
- Each set of Main Keyword, Title, and NLP Keyword will be the main input for generating an article.
- The settings for the remaining fields will be shared across all articles
6. How to add WordPress site integrations and upload an article to a WordPress site in SmartAIArticle?
To upload a generated article, your WordPress site should have Application Passwords enabled and create an Application Password for the WordPress as instructed below:
Application Passwords have been integrated into WordPress since version 5.6. For older versions, you can install the Application Passwords plugin to enable this functionality.
6.1. How to add WordPress site integrations to SmartAIArticle?
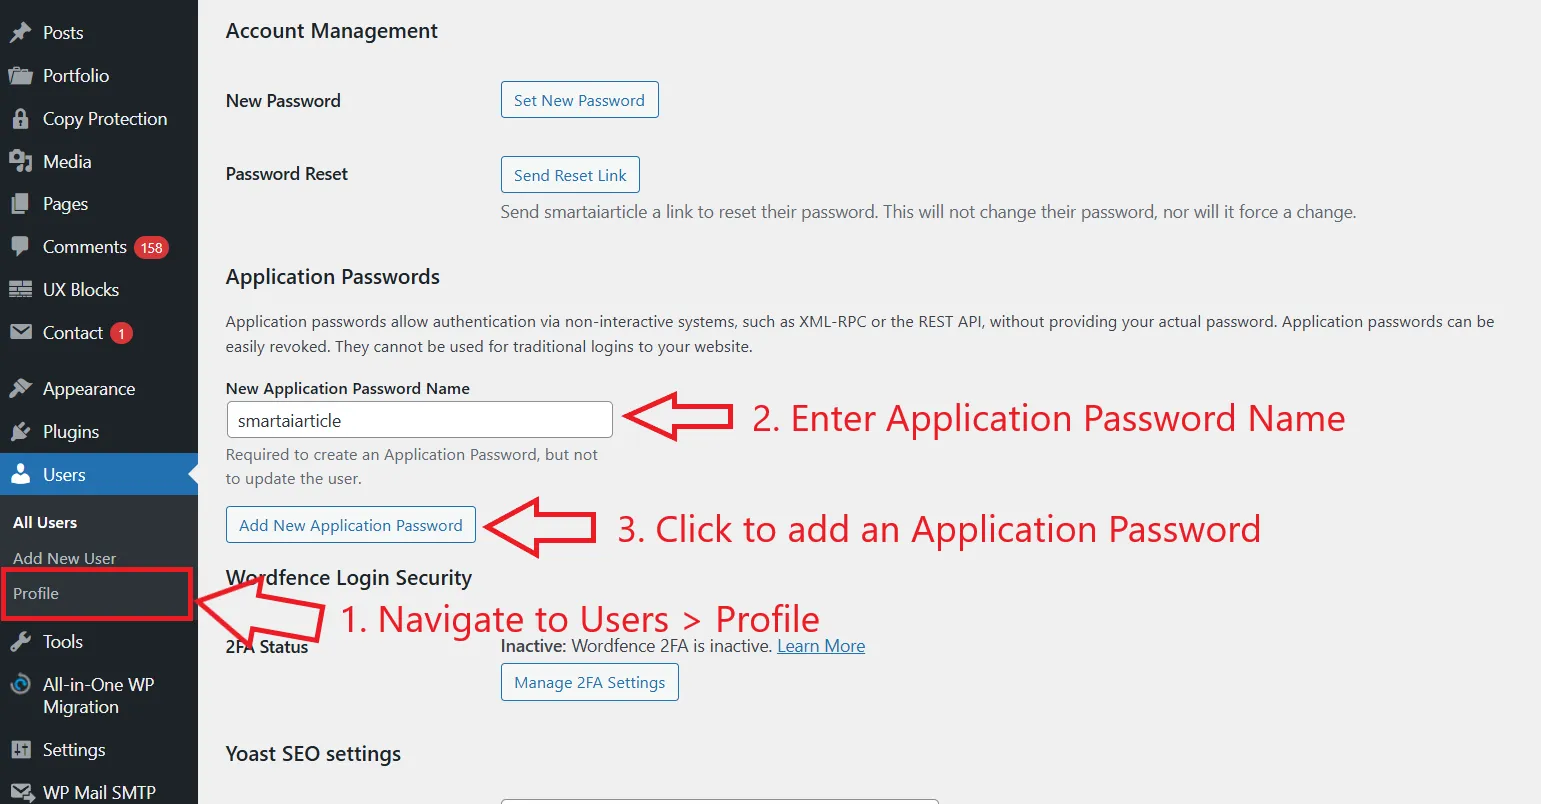
To add WordPress site integrations to SmartAIArticle, you first need to create an Application Password by following these steps:
- Log in to WordPress as an administrator
- Navigate to Users > Profile
- Scroll down to Application Passwords
- Click Add New Application Password
- Enter New Application Password Name
- Click Generate Password
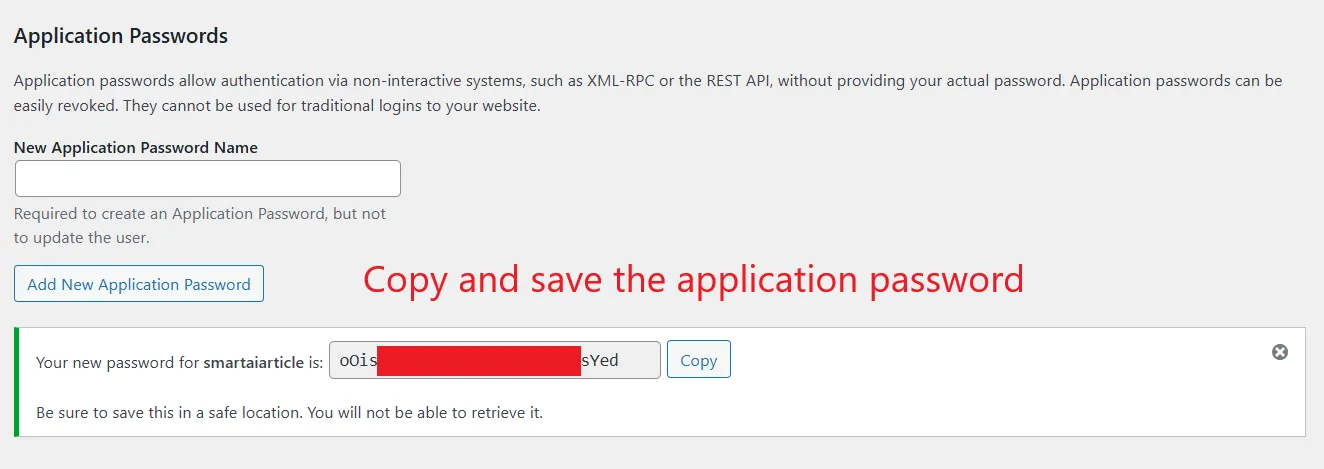
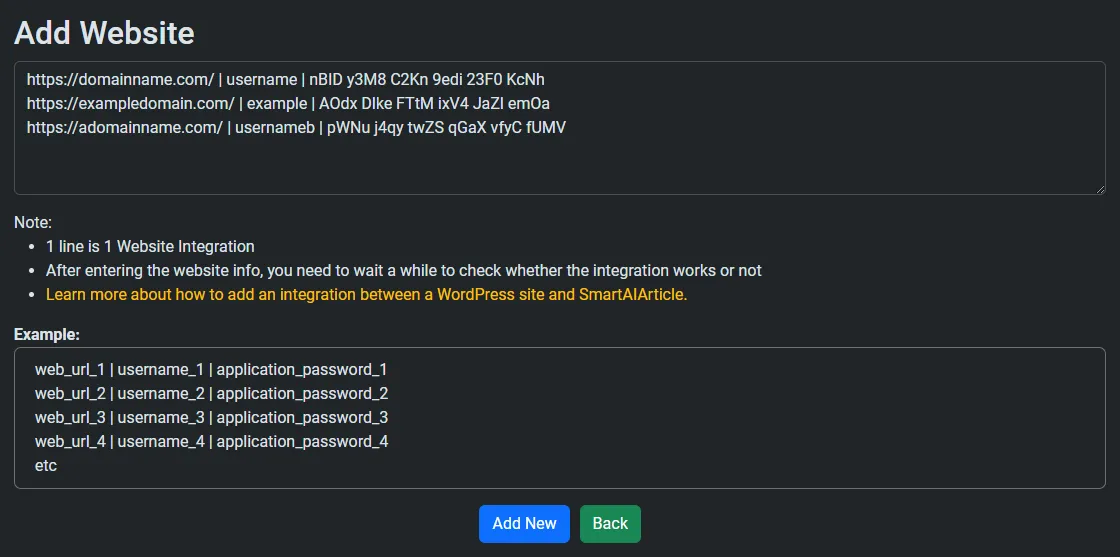
After creating the Application Passwords for your WordPress site, you can add them into SmartAIArticle by following the steps:
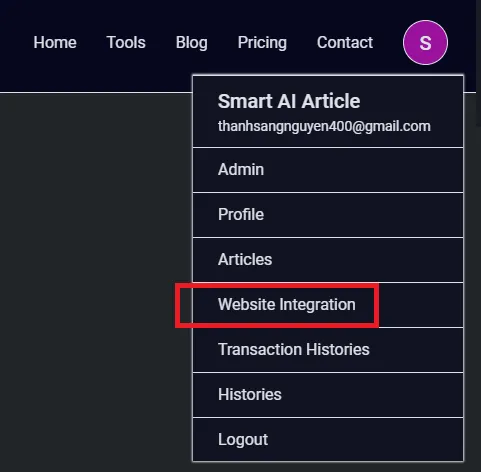
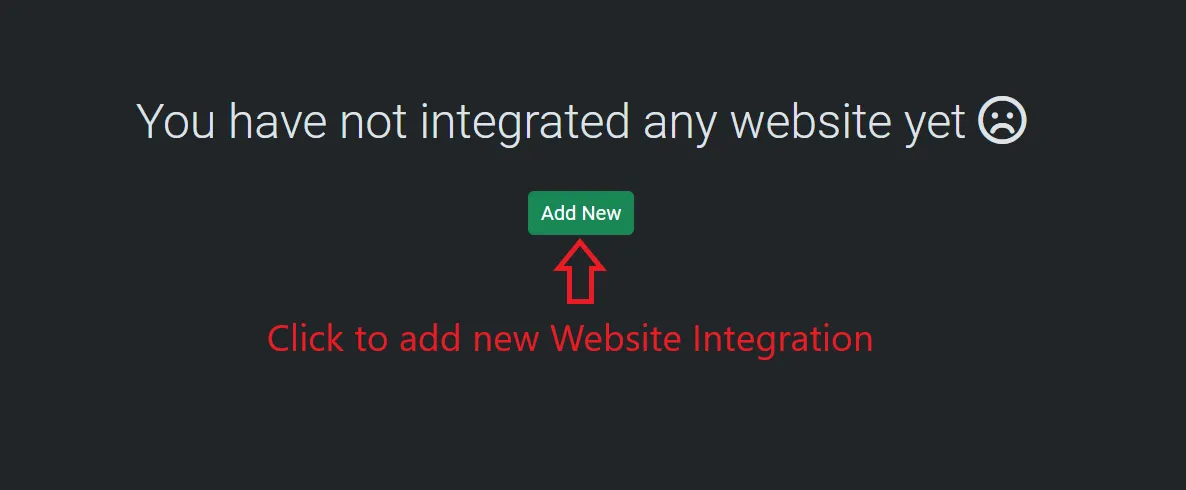
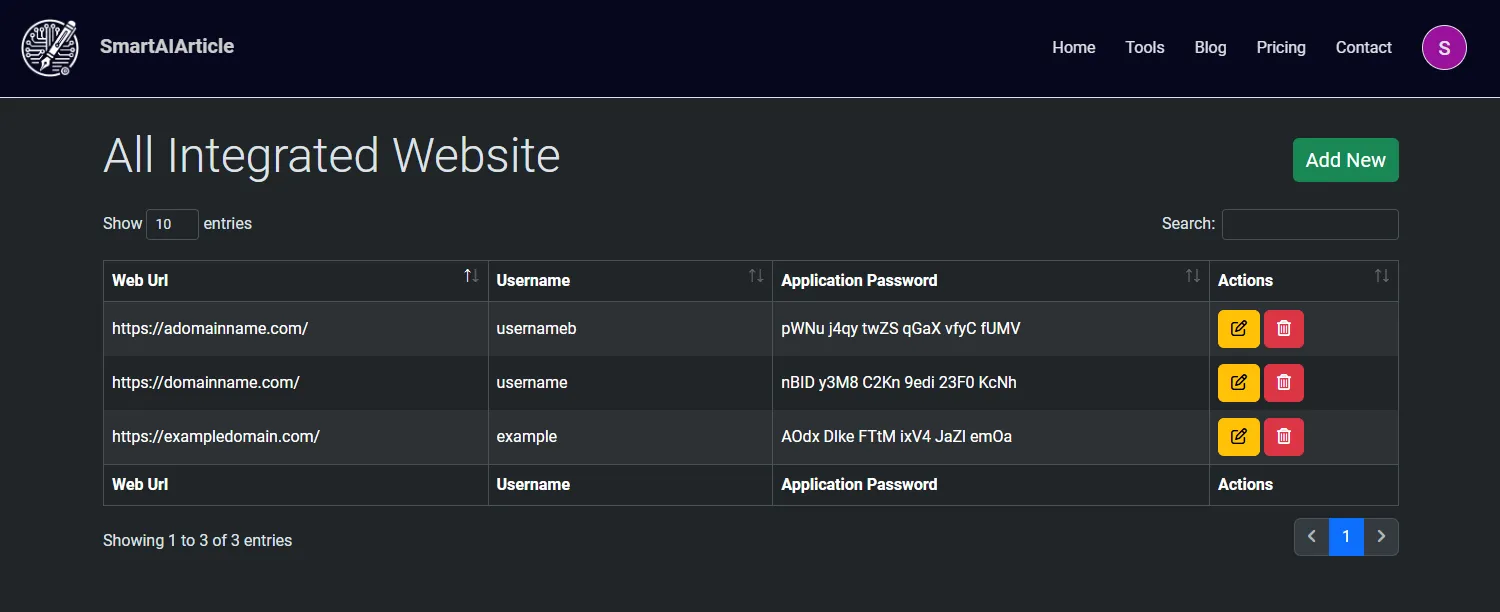
- Navigate to Website Integration
- Click the Add New button to add WordPress site integrations
- Use the created information and add it in this format: "web_url | username | Application Password" and click Save.
For example: https://adomainname.com/ | usernameb | pWNu j4qy twZS qGaX vfyC fUMV
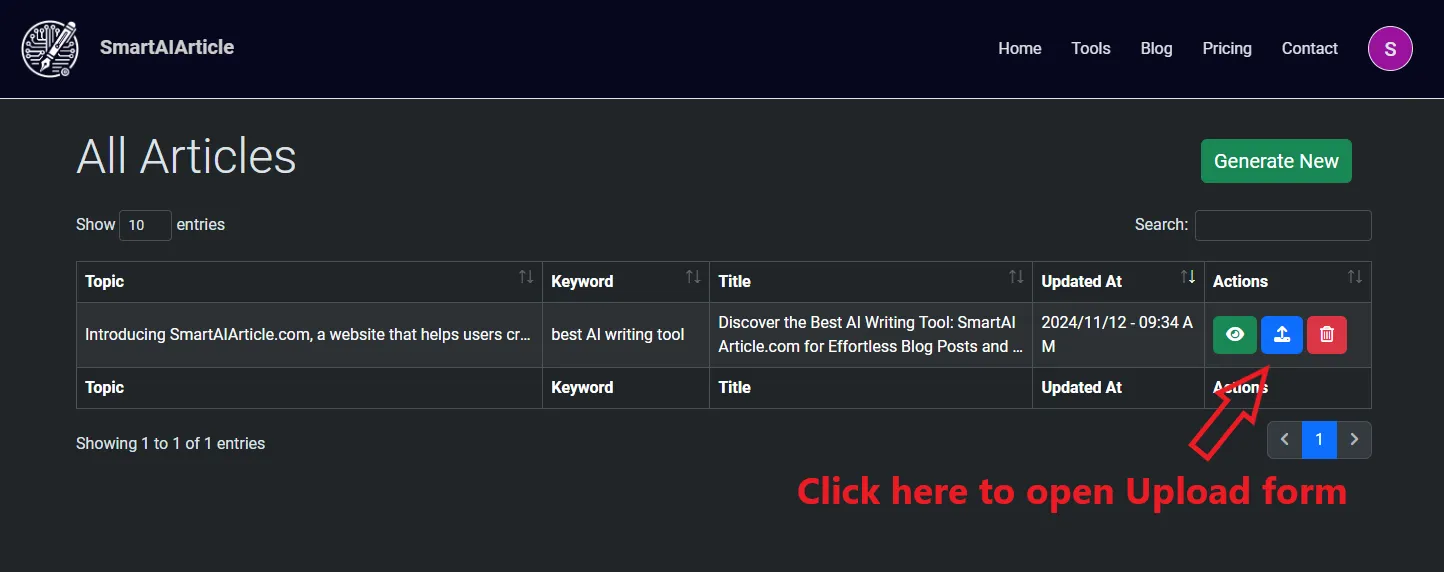
6.2. How to upload an article to a WordPress site in SmartAIArticle?
Navigate to Articles and click the Upload button to open the upload form
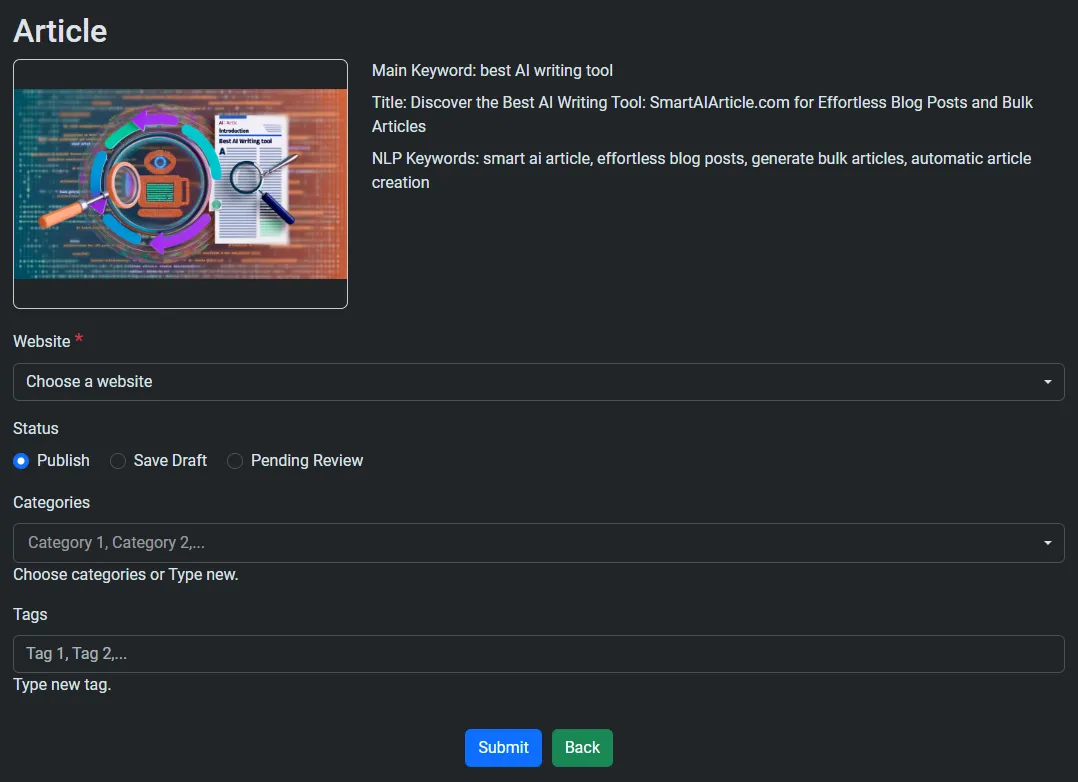
Change form info
- Featured Image: The featured image for the article
- Website: Select the website where you want to publish the article
- Categories: The categories you want to use for the article on your website. After selecting a website, the categories will be automatically retrieved via the website's REST API. You can choose from the existing categories on the website or create new ones by entering the desired categories.
- Tags: The tags you want to use for the article on your website.
You can enter multiple categories or tags, each separated by a comma (",").
Once you've completed the information form, then click Submit.
In the end, thank you for following the tutorial. Please do not hesitate to contact us for more information.